


How to Bike the Northside Heights Trails
How to Bike the Northside Heights Trails The Northside Heights Trails are a network of scenic, well-maintained bike paths weaving through forests, ridgelines, and historic neighborhoods in the heart of Northside Heights. Designed for cyclists of all skill levels, these trails offer more than just a ride—they provide a gateway to nature, community, and physical wellness. Whether you're a seasoned m
How to Bike the Northside Heights Trails
The Northside Heights Trails are a network of scenic, well-maintained bike paths weaving through forests, ridgelines, and historic neighborhoods in the heart of Northside Heights. Designed for cyclists of all skill levels, these trails offer more than just a ridethey provide a gateway to nature, community, and physical wellness. Whether you're a seasoned mountain biker seeking technical challenges or a casual rider looking for a peaceful escape from urban life, the Northside Heights Trails deliver an unmatched experience. Understanding how to bike these trails effectively isnt just about navigation; its about safety, sustainability, and maximizing enjoyment. This guide breaks down every critical aspectfrom trail etiquette and gear selection to route planning and environmental stewardshipso you can ride with confidence, competence, and respect for the landscape.
Step-by-Step Guide
Step 1: Research and Map Your Route
Before you even touch your bike, invest time in mapping your intended route. The Northside Heights Trails span over 45 miles across interconnected segments, each with varying terrain, elevation, and surface conditions. Start by visiting the official Northside Heights Trails Conservancy website, where youll find downloadable PDF maps and interactive digital versions compatible with GPS devices. Pay close attention to trail markers: blue diamonds indicate beginner-friendly paths, green circles denote intermediate routes, and black diamonds mark advanced technical sections. Avoid relying solely on generic mapping apps like Google Mapsthey often mislabel trail access points or omit seasonal closures.
For first-timers, we recommend the Riverside Loop, a 6.2-mile circuit that begins at the Maplewood Trailhead. This route combines gentle climbs, shaded forest stretches, and a scenic overlook of the Silver Creek. Its fully paved for the first 2.1 miles, then transitions to compact gravelideal for learning trail handling without overwhelming technical difficulty. Print a physical copy of your map or save it offline on your smartphone. Cell service is unreliable in the deeper forest sections, so preparation is non-negotiable.
Step 2: Choose the Right Bike
Not all bikes are suited for the Northside Heights Trails. While some paved segments accommodate road bikes, the majority of the network features loose gravel, root-laced singletrack, and steep, muddy descents. A hybrid bike with 1.75 to 2.25 tires and front suspension is the most versatile choice for beginners and casual riders. For those seeking more performance on technical terrain, a hardtail mountain bike with 27.5 or 29 wheels and tubeless-ready tires offers superior traction and control.
Never attempt the advanced black diamond trails on a city commuter bike or a rigid steel-frame cruiser. These bikes lack the shock absorption, tire clearance, and gear range needed for sustained climbs or sudden obstacles. If you dont own a suitable bike, several local shopsincluding TrailWise Cycles and Summit Gear Rentalsoffer daily rentals with helmets, pumps, and repair kits included. Always inspect your bike before departure: check tire pressure (aim for 3550 PSI depending on terrain), brake responsiveness, and chain lubrication. A squeaky chain or spongy brake can turn a pleasant ride into a dangerous situation.
Step 3: Pack Essential Gear
Even on short rides, carrying the right gear can mean the difference between a smooth ride and a stranded ordeal. Every cyclist should carry the Five Essentials:
- Water: At least 20 oz. per hour of riding, more on hot days. Hydration bladders are preferred over bottles for easy access.
- Snacks: Energy bars, trail mix, or bananas to maintain blood sugar during longer rides.
- Repair Kit: Spare inner tube, tire levers, mini pump or CO2 inflator, multi-tool with chain breaker, and zip ties.
- First Aid: Bandages, antiseptic wipes, and blister treatmenttrailside falls are common.
- Weather Layers: Even in summer, temperatures drop rapidly in shaded canyons. Pack a lightweight windbreaker or arm warmers.
Additional items include a whistle (for signaling if lost), a fully charged phone in a waterproof case, and a trail map. Avoid overpackingevery extra ounce adds fatigue. A saddlebag or frame-mounted pack is preferable to a bulky backpack, which can cause overheating and imbalance on technical descents.
Step 4: Understand Trail Signage and Right-of-Way Rules
The Northside Heights Trails follow standardized signage developed by the International Mountain Bicycling Association (IMBA). Yellow diamond signs indicate trail names and junctions. Red X signs mean ClosedDo Not Enter, often due to erosion, wildlife activity, or maintenance. Blue arrows point to the correct direction at forks; if youre unsure, pause and reorient using your map.
Right-of-way rules are strictly enforced for safety and harmony among users:
- Bikers yield to hikers and equestrians. Always slow down and announce your presence when approaching from behind.
- Downhill riders yield to uphill riders. Climbers expend more energy and have limited visibility; its courteousand saferto let them pass.
- Groups ride single file. Riding side-by-side blocks narrow trails and creates hazards for others.
Use a clear, friendly voice to announce On your left! before passing. Avoid loud music or headphonesyour ears must remain open to natural cues like approaching footsteps or animal movement.
Step 5: Master Trail Riding Techniques
Technical sections demand specific skills. Heres how to handle the most common challenges:
- Roots and Rocks: Keep your weight centered, slightly back over the saddle. Bend your elbows and knees to absorb impacts. Look ahead, not at the obstacleyour bike follows your gaze.
- Steep Descents: Lower your saddle if possible. Shift your hips back behind the saddle, brake gently with both levers, and keep your pedals level to avoid pedal strikes. Never lock your brakes.
- Muddy Sections: Maintain momentum. Stalling in mud causes you to sink. Use a slightly lower gear and pedal smoothly. If you start to slide, gently steer into the skid.
- Switchbacks: Approach wide, then cut the apex. Lean your bike, not your body. Look through the turn, not at the dirt.
Practice these skills on easier trails before attempting advanced terrain. Many local clubs offer free Trail Skills Clinics on Saturday mornings at the Cedar Ridge Trailhead. These sessions include cone drills, braking exercises, and low-speed maneuveringperfect for building confidence.
Step 6: Time Your Ride Wisely
Trail conditions vary dramatically by season and time of day. Spring (MarchMay) brings wildflowers and soft, wet trailsideal for riders who enjoy mud and need extra traction. Summer (JuneAugust) offers long daylight hours but can be humid and buggy; ride early morning or late afternoon to avoid peak heat and insects. Fall (SeptemberNovember) is widely considered the best season: crisp air, dry trails, and vibrant foliage. Winter (DecemberFebruary) sees limited use; some trails close due to ice or snow, but hardy riders enjoy the solitude and packed snow conditions on paved segments.
Avoid riding during or immediately after heavy rain. The trails become slick and prone to erosion. Wait at least 2448 hours after rainfall before hitting the singletrack. Also, avoid weekends between 10 a.m. and 3 p.m. if you prefer solitudethe trails are busiest then. Weekday mornings, especially Tuesday and Wednesday, offer the quietest conditions.
Step 7: Respect Wildlife and Vegetation
Northside Heights is home to deer, foxes, owls, and rare wild orchids. Stay on marked trails at all times. Straying off-trail damages fragile root systems and disturbs nesting areas. Never feed animalseven a seemingly harmless peanut can disrupt their natural foraging behavior. Store food securely; bears are rare but not unheard of in the northernmost sections. Use odor-proof bags if carrying snacks overnight.
When you encounter a trailside plant you dont recognize, admire itbut dont pick or trample it. Many native species are protected under state conservation laws. If you spot invasive plants like Japanese knotweed or garlic mustard, report them to the Conservancy via their online form. Your vigilance helps preserve the ecosystem for future riders.
Step 8: Know Your Limits and Turn Back When Needed
Its not weakness to turn around. Many riders push too far, too fast, and end up exhausted, dehydrated, or lost. Before you leave, set a turnaround timesay, 2 p.m.and stick to it. If youre feeling lightheaded, your legs are burning, or the trail becomes unfamiliar, stop. Use your map to reorient. If youre unsure of your location, call a friend or use your phones GPS to mark your position. Never continue riding when fatigued. The trail will still be there tomorrow.
Best Practices
Practice Leave No Trace Principles
The Northside Heights Trails thrive because riders respect them. Follow the seven Leave No Trace principles:
- Plan Ahead and Prepare. Know the weather, trail conditions, and regulations.
- Travel and Camp on Durable Surfaces. Stay on designated trails and avoid cutting switchbacks.
- Dispose of Waste Properly. Carry out all trash, including biodegradable items like apple cores or banana peels.
- Leave What You Find. Dont carve names into trees or collect rocks or flowers.
- Minimize Campfire Impacts. Fires are prohibited on all trails except at designated picnic areas.
- Respect Wildlife. Observe from a distance. Never chase or feed animals.
- Be Considerate of Other Visitors. Keep noise low and yield appropriately.
These arent suggestionstheyre the foundation of trail sustainability. Every rider who follows them helps ensure the trails remain open and pristine.
Maintain Your Bike Regularly
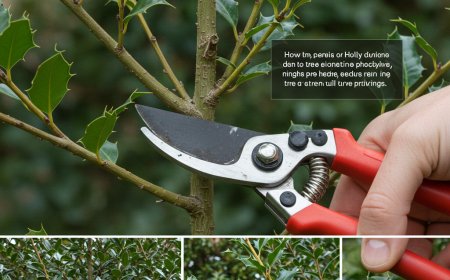
Regular maintenance prevents breakdowns and extends your bikes life. After every ride, wipe down your chain and derailleur with a dry cloth. Once a week, apply bicycle-specific lubricant to the chain, then wipe off excess. Monthly, check brake pads for wearreplace them if the grooves are gone or if braking feels spongy. Every three months, have your bike professionally tuned: wheel truing, cable tension adjustment, and bearing inspection are critical.
Store your bike indoors or under cover. Exposure to rain and sun degrades rubber components and rusts metal parts. A simple bike cover or garage hook makes a huge difference.
Join the Community
The Northside Heights Trails community is active, welcoming, and passionate. Join the Northside Heights Cycling Club, which hosts weekly group rides, trail cleanups, and safety workshops. Participating connects you to local knowledge: new trail openings, hidden water sources, and seasonal closures. Many members share GPS tracks and ride logs, making route planning easier. Youll also meet mentors who can help you improve your technique.
Document and Share Responsibly
While its tempting to post a video of your latest downhill run, avoid sharing exact GPS coordinates or trail secrets on public social media. Overexposure leads to overcrowding, erosion, and potential trail closures. Instead, share general experiences: The fall colors on the Cedar Ridge Trail were breathtaking! or Great group ride with the Cycling Club today! This promotes the trails without compromising their integrity.
Report Issues Promptly
See a fallen tree blocking the trail? A washed-out section? A missing sign? Report it immediately. The Northside Heights Trails Conservancy operates a real-time reporting portal at trails.northsideheights.org/report. Include photos, location markers, and a brief description. Volunteers respond within 72 hours. Your report helps maintain safety and keeps the trails accessible for everyone.
Tools and Resources
Recommended Apps and Digital Tools
- AllTrails Pro: Offers detailed trail descriptions, user reviews, elevation profiles, and offline map downloads. The Northside Heights network is fully mapped here.
- Strava: Tracks your rides, compares your times with others, and highlights popular segments. Use the Segment feature to challenge yourself on known climbs.
- Trailforks: The gold standard for mountain biking maps. Includes real-time trail condition updates, difficulty ratings, and user-submitted photos.
- Gaia GPS: Excellent for off-grid navigation. Lets you overlay topographic maps and track your position without cell service.
Essential Gear Checklist
Invest in quality gear that enhances safety and comfort:
- Helmet: MIPS-certified, with good ventilation. Replace every 35 years or after any impact.
- Gloves: Padded palms reduce vibration and improve grip. Full-finger gloves offer protection from brush and sun.
- Eye Protection: Clear or amber lenses for low light; tinted for bright days. Sunglasses with anti-fog coating are ideal.
- Lights: Front (500+ lumens) and rear (100+ lumens) lightseven for daytime rides, they improve visibility in shaded areas.
- Lock: A U-lock or heavy-duty cable to secure your bike at trailheads.
- Trail Shoes: Stiff-soled shoes with grip improve pedal efficiency. Avoid running shoesthey lack support and slip on pedals.
Local Bike Shops and Services
These shops support the trail community with rentals, repairs, and education:
- TrailWise Cycles 124 Ridgeview Ave. Offers free trail safety seminars every first Saturday. Rent full-suspension bikes for $45/day.
- Summit Gear Rentals 308 Northside Plaza. Specializes in e-bike rentals with extended battery rangeperfect for longer routes.
- Northside Bike Co-op Volunteer-run repair station at the Maplewood Trailhead. Free air pumps, basic tools, and advice.
Official Resources
- Northside Heights Trails Conservancy trails.northsideheights.org Official maps, rules, volunteer opportunities, and trail condition alerts.
- IMBA Trail Solutions imba.com Best practices for sustainable trail use and design.
- State Park Service Trail Regulations stateparks.northside.gov/trails Legal requirements and protected area guidelines.
Real Examples
Example 1: Sarahs First Ride The Riverside Loop
Sarah, a 32-year-old teacher, had never ridden a mountain bike before. She rented a hybrid from Summit Gear Rentals and followed the Riverside Loop map. She started at 8 a.m. on a crisp October morning. The paved section gave her confidence, and the gravel stretch felt smooth under her wider tires. At the overlook, she paused to photograph a red-tailed hawk. When she encountered a hiker on a narrow section, she stopped, smiled, and said, On your left! The hiker nodded gratefully. Sarah finished in 52 minutes, tired but exhilarated. She returned the next week with her sister and joined the Cycling Club. I didnt know biking could feel like meditation, she said.
Example 2: Marcus and the Fallen Tree
Marcus, an experienced rider, was on the Blackwood Ridge trail when he encountered a large oak fallen across the path. Instead of climbing over or turning back, he pulled out his phone and used the Trailforks app to report the obstruction with a photo and GPS coordinates. Within 48 hours, a volunteer crew cleared the debris. Marcus later received an email from the Conservancy thanking him. I didnt think it mattered, he admitted. But now I know every riders action adds up.
Example 3: The E-Bike Family Adventure
The Chen familyparents and two teensused e-bikes to explore the Northside Heights Trails together. The assist feature allowed their 14-year-old, who had limited stamina, to keep up with the adults on steep climbs. They rode the Heritage Loop, a 12-mile route that passes three historic sites, including a 19th-century mill. They packed sandwiches, took breaks at shaded benches, and shared stories. It wasnt about speed, said Mr. Chen. It was about being outside, together.
Example 4: The Seasonal Closure Lesson
Last spring, a group of riders ignored a red X sign on the Pine Hollow trail, thinking it was just temporary. Two days later, the trail was closed for six weeks due to severe erosion caused by unauthorized use. The Conservancy posted photos of the damage and a video explaining how foot traffic and bike tires had torn up the root system. The group later volunteered for a trail restoration day. We thought we were being adventurous, said one rider. We didnt realize we were breaking the trail.
FAQs
Do I need a permit to bike the Northside Heights Trails?
No permit is required for recreational biking. The trails are open to the public daily from sunrise to sunset. However, organized events, races, or commercial guided tours must apply for a special use permit through the Conservancy website.
Are e-bikes allowed on all trails?
Class 1 e-bikes (pedal-assist only, max 20 mph) are permitted on all trails. Class 2 and Class 3 e-bikes (throttle-assist or higher speed) are restricted to paved and gravel paths only. They are prohibited on singletrack trails marked for mountain biking to preserve trail integrity and safety.
Can I bring my dog?
Dogs are welcome on all trails but must be leashed at all times (6-foot maximum). Owners are responsible for cleaning up waste. Some sensitive areas near wildlife habitats may have seasonal leash restrictionscheck the trail map before you go.
What should I do if I get lost?
Stay calm. Use your GPS app to mark your location. Retrace your steps to the last known trail marker. If youre still unsure, call a friend or use your phone to contact the Conservancys emergency line (listed on trailhead signs). Never wander off-trail searching for a way out.
Is there cell service on the trails?
Cell service is inconsistent. Youll likely have coverage near trailheads and paved roads, but most forested and canyon sections have no signal. Download offline maps and carry a physical map as backup.
Are there restrooms or water fountains on the trails?
Restrooms are available at five major trailheads: Maplewood, Cedar Ridge, Silver Creek, Pine Hollow, and Summit View. There are no water fountains on the trails themselves. Carry all the water youll need.
Can I bike in the rain?
Light rain is manageable with proper gear, but avoid riding after heavy rainfall. Wet trails are slippery and easily damaged. Wait 2448 hours for the ground to dry. Mud and erosion are permanent problems if riders ignore warnings.
Are there guided tours available?
Yes. The Northside Heights Cycling Club offers free guided group rides every Saturday. Private guided tours are also available through TrailWise Cycles for a fee. These are excellent for learning trail history, ecology, and technique.
Whats the best time of year to ride?
September through November offers the most favorable conditions: cool temperatures, dry trails, and stunning fall colors. May and June are also excellent, with blooming wildflowers and fewer crowds.
Can children ride these trails?
Absolutely. The Riverside Loop and Heritage Loop are ideal for kids on balance bikes or small mountain bikes. Always supervise children closely. Trailforks has a Family-Friendly filter to help identify easy routes.
Conclusion
Biking the Northside Heights Trails is more than recreationits a ritual of connection. Connection to the land, to the rhythm of your breath, to the quiet hum of the forest, and to the community of riders who value these paths as much as you do. By following this guide, youre not just learning how to ride a bike on dirtyoure becoming a steward of something rare and beautiful. The trails dont belong to any one person. They belong to the next rider who needs peace, the child who discovers courage on a steep climb, the elder who finds joy in movement, and the wildlife that calls this place home.
So lace up your shoes, check your tires, and head out. Ride with awareness. Ride with kindness. Ride with purpose. The Northside Heights Trails are waitingnot to be conquered, but to be experienced.


![Play99 Login & Registration Guide for Indian Users [2025 Update]](https://www.atlantanewsplus.com/uploads/images/202507/image_140x98_6870c1df7bfcd.jpg)